how to sterilize baby bottles
See the Baby Brezza One Step Sterilizer and Dryer
To sterilize a baby bottle, always clean it first: take it apart and wash every piece in hot, soapy water, then kill the remaining germs using one CDC-approved method. Your options are an electric steam sterilizer, 5 minutes of boiling, a microwave steam bag, your dishwasher’s sanitize cycle, or a cold-water bleach soak. Let everything air-dry completely before you put it back together. Below I’ll walk through all five methods, show you the exact one we use every day, and clear up the big question new parents always ask: do you really have to sterilize every single time? (Usually not.)
Sterilizing vs. sanitizing vs. cleaning: what’s the difference?
These words get thrown around like they mean the same thing, and it tripped me up as a first-time dad, so let’s clear it up fast:
- Cleaning is the everyday step: soap and hot water (or the dishwasher) to remove milk residue and most germs. You do this after every feeding.
- Sanitizing is the extra germ-killing step on top of cleaning, using heat (boiling, steam, or a dishwasher sanitize cycle) or a diluted bleach solution. This is what the CDC recommends for extra protection.
- Sterilizing is the word most parents (and product boxes) use for that same extra step. Technically, true sterilization is a higher medical bar, but for home bottle care, “sterilize” and “sanitize” are used interchangeably.
Bottom line: whatever you call it, you clean first, then sterilize. Sterilizing a bottle that still has milk film in it doesn’t work, because the germs hide under the residue.
Do you need to sterilize baby bottles after every use?
Short answer: no, not for most babies. This is the biggest myth new parents get stressed about. Here’s what the CDC actually says:
- Sterilize before the very first use. Brand-new bottles get sterilized once before they ever touch formula or milk.
- After that, clean after every feeding and sanitize at least once a day. Daily sterilizing is especially important if your baby is under 2 months old, was born premature, or has a weakened immune system.
- For older, healthy babies with access to clean, safe water, the CDC says daily sterilizing may not be necessary as long as bottles are cleaned carefully after each use.
So if you have a healthy 8-month-old and clean water, you don’t have to run the sterilizer around the clock. When our daughter was a newborn, we sterilized daily for peace of mind; as she got older we eased off. Talk to your pediatrician about what’s right for your baby.
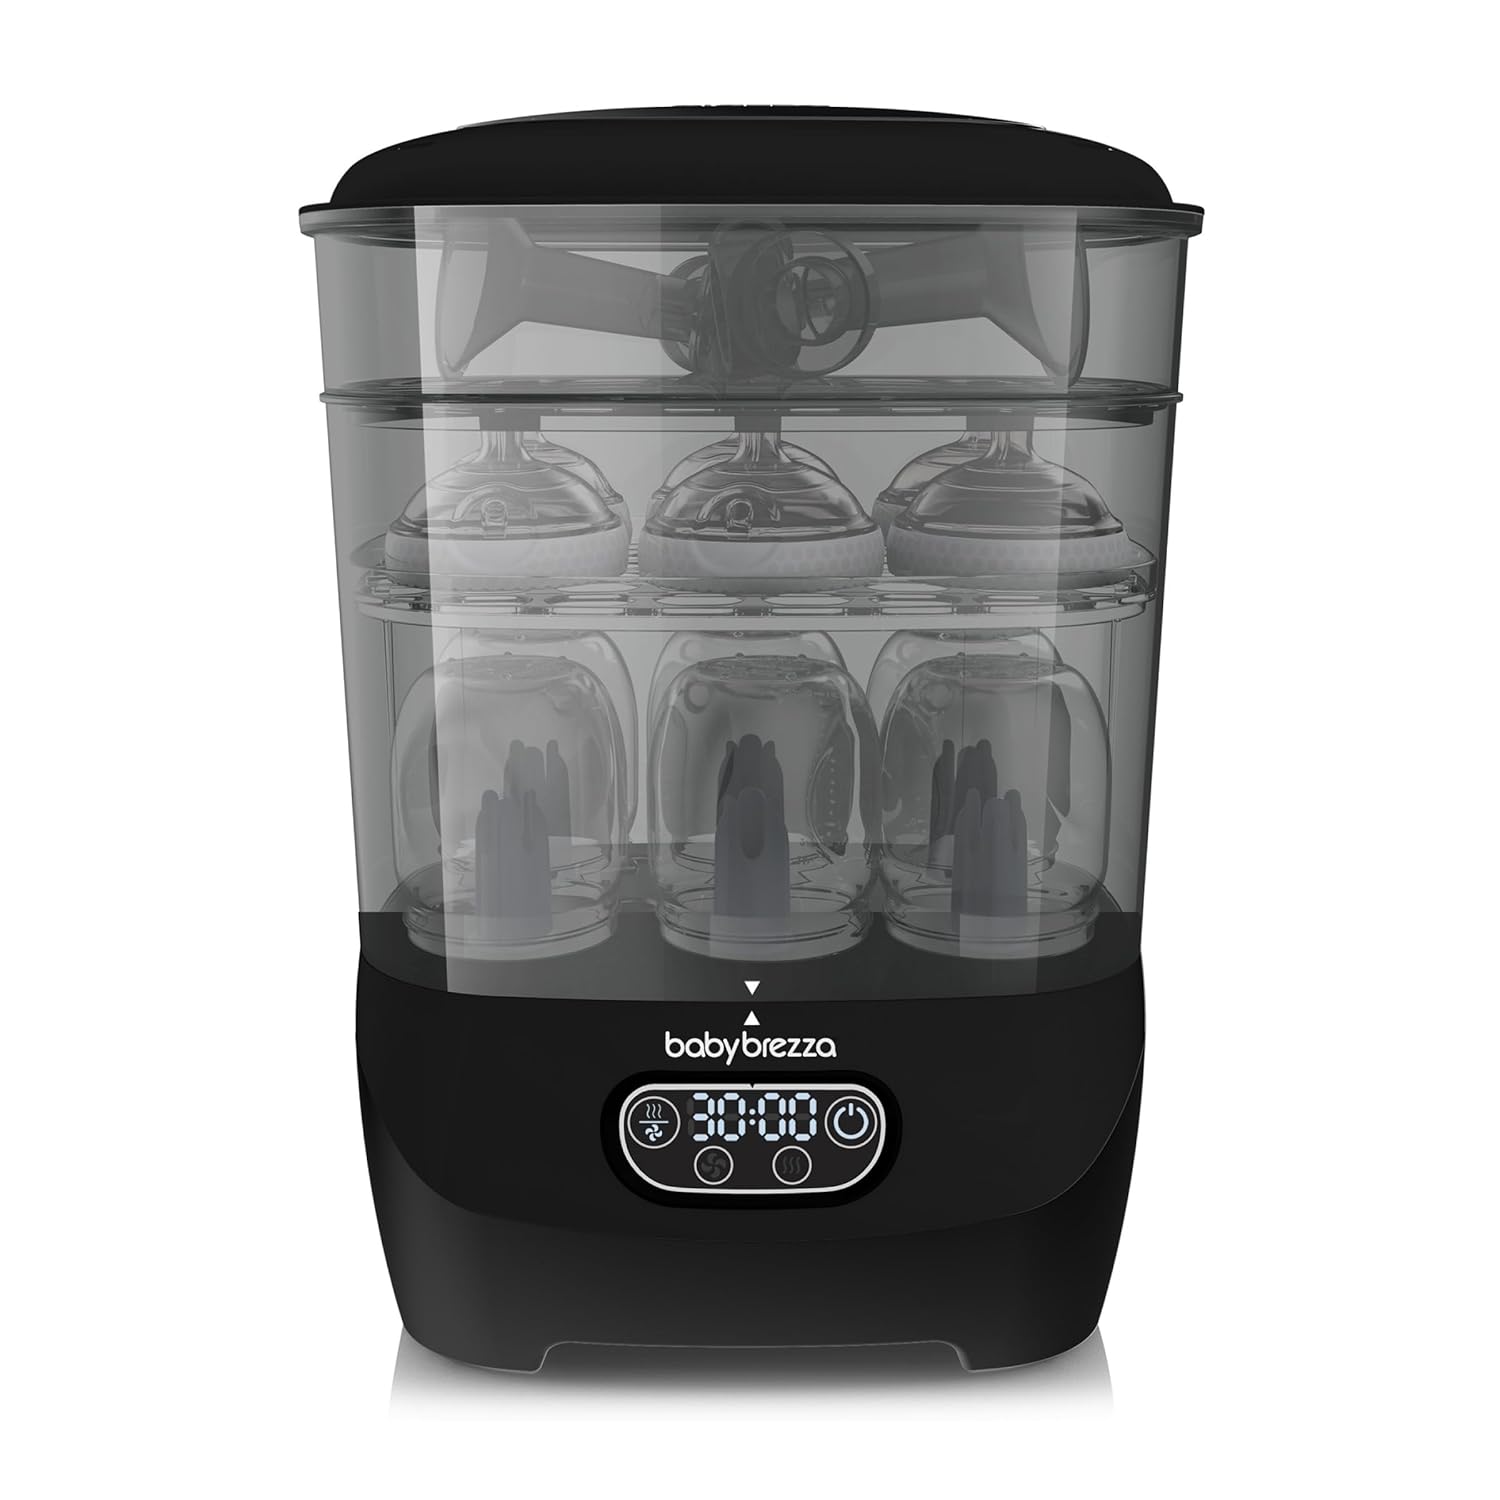
See the Baby Brezza One Step Sterilizer and Dryer
How to sterilize baby bottles: 5 methods (from easiest to old-school)
Every method below is CDC-approved. The first one is what we reach for every day because it’s genuinely hands-off, but I’ll be honest about the trade-offs on each so you can pick what fits your kitchen and budget.
1. Electric steam sterilizer (the easiest, and what we use)
An electric steam sterilizer heats a small amount of water into steam that fills a sealed chamber and kills 99.9% of germs, with no pot to watch, no tongs, and no guesswork. We use the Baby Brezza One Step Sterilizer and Dryer Advanced, and the reason I love it is the “dryer” part: most methods leave you with wet bottles you still have to air-dry, but this one steam-sterilizes and dries with HEPA-filtered air in the same cycle, so bottles come out ready to use. Baby Brezza says items stay sterile for up to 48 hours as long as you keep the lid on.
Here’s exactly how we run it (this is the machine in the video above):
- Clean and rinse everything first. Bottles, nipples, collars, caps, and pump parts all need to be empty, washed, and fully rinsed before they go in. The sterilizer isn’t a substitute for washing.
- Add water to the fill line. Pour water onto the stainless heating plate up to the MAX line (about 165 ml / 5.5 oz on the Advanced). Which water you use matters, see the hard-water tip below.
- Load bottles opening-down. Bottles go mouth-down on the posts so steam reaches inside and water drains out. Put nipples, caps, and small parts on the accessory rack and in the upper basket. Don’t overload it, or the drying suffers.
- Seat the lid and power on. Make sure the lid sits flush with no gaps, then press the power button so the function icons light up.
- Pick your function. You get four: sterilize and dry, sterilize only, dry only, or storage rack. We almost always choose sterilize and dry so it’s a true one-and-done.
- Choose a dry time and walk away. Pick 30, 45, or 60 minutes of drying. The cycle starts a few seconds after your last press and the timer counts down. When it’s done it beeps and shuts off automatically.
- Let it cool about 5 minutes before opening. There’s hot steam in there, so give it a few minutes before you lift the lid.
First-hand hard-water tip: if you have hard tap water, you’ll start to see white mineral staining build up on the plate. I’ve watched it happen in ours. Baby Brezza recommends distilled water to prevent that scale, and it’s the single easiest way to keep the machine running well. If you do use tap or bottled water, plan to descale more often (a 50/50 white-vinegar-and-water soak on the plate every couple of weeks does the job).
Check the current price of the Baby Brezza One Step Sterilizer and Dryer Advanced on Amazon
Pros: completely hands-off, sterilizes and dries in one cycle, works with any brand of bottle. Cons: it’s an upfront purchase, it takes up counter space, and you’ll want distilled water and occasional descaling.
2. Boiling (free, works with almost anything)
The classic method, and the CDC still endorses it. Place your clean, disassembled bottle parts in a pot, cover completely with water, bring to a rolling boil, and boil for 5 minutes. Remove the parts with clean tongs and set them on a clean towel to air-dry. Just check that your bottles are boil-safe first, because some silicone and plastic parts don’t love repeated boiling.
Pros: free, no equipment. Cons: you have to watch the pot, it’s easy to warp cheaper plastics over time, and everything comes out soaking wet.
3. Microwave steam (fast and cheap)
Microwave steam sterilizer bags (and microwave sterilizer tubs) use the same steam principle in a few minutes. Add the small amount of water the package specifies, microwave for the stated time, and follow the product’s cooling and draining instructions. One safety note: don’t microwave glass bottles in steam bags, and never use the microwave to warm formula, because it creates hot spots.
Pros: cheap, fast, travel-friendly. Cons: small capacity, and results depend on following each product’s directions exactly.
4. Dishwasher sanitize cycle (two chores in one)
If your bottles are labeled dishwasher-safe, you can clean and sanitize in one go. Take everything apart, put small parts in a closed-top basket or mesh bag so they don’t fall into the filter, and run a hot-water cycle with a heated drying or “sanitize” setting. The CDC notes that if you use a hot cycle with heated dry, a separate sanitizing step isn’t even necessary.
Pros: cleans and sanitizes at once, totally hands-off. Cons: needs a dishwasher with a hot or sanitize setting, and not every bottle is dishwasher-safe.
5. Cold-water bleach solution (the backup method)
The CDC lists this for when you can’t boil, steam, or use a dishwasher. Mix 2 teaspoons of unscented bleach per gallon (16 cups) of water in a clean basin, submerge all the parts with no trapped air bubbles, squeeze the solution through the nipple holes, and soak for at least 2 minutes. Remove with clean hands or tongs and do not rinse, air-dry instead. Any leftover bleach breaks down as it dries and won’t hurt your baby.
Pros: works with no power or hot water. Cons: most parents’ last resort, and it requires care with measurements.
Baby bottle sterilizing methods compared
| Method | Time | Effort | Best for |
|---|---|---|---|
| Electric steam sterilizer | About 10 min plus dry cycle | Hands-off | Daily use; dries bottles too |
| Boiling | 5 min boil | Watch the pot | Occasional use, no gear |
| Microwave steam | A few minutes | Low | Travel, small batches |
| Dishwasher sanitize | Full cycle | Hands-off | Cleaning plus sanitizing at once |
| Bleach solution | 2 min soak | Moderate | No power or backup only |
How to dry and store bottles so they stay germ-free
Drying is where a lot of people accidentally undo their hard work. The CDC is specific here:
- Air-dry on a clean, unused dish towel or paper towel. Don’t rub or pat parts dry with a towel, because that can transfer germs right back onto them.
- Go easy on drying racks. They can trap moisture and grow mold. If you use one, keep it for baby items only and wash it regularly. (This is exactly why we like that our sterilizer dries the bottles itself.)
- Store dry. Once everything is completely dry, reassemble the bottles and store them in a clean, closed cabinet. Wash your hands first.
Common baby-bottle sterilizing mistakes to avoid
- Skipping the wash. Sterilizing over dried-on milk doesn’t work. Clean first, every time.
- Adding new milk to a partly-used bottle. Toss leftover formula after 2 hours and start with a clean bottle.
- Towel-drying. Air-dry instead, as above.
- Using hard tap water in a steam sterilizer without descaling. You’ll get scale buildup fast, so distilled water is worth it.
- Over-worrying. Constant sterilizing of every bottle isn’t necessary for older, healthy babies. Clean consistently, sterilize as recommended, and give yourself a break.
Frequently asked questions
How long do you sterilize baby bottles?
It depends on the method: 5 minutes at a rolling boil, a few minutes in a microwave steam bag, or one automatic cycle in an electric steam sterilizer (about 10 minutes of steam, plus a 30 to 60 minute dry cycle if it dries too). A bleach soak needs at least 2 minutes.
How often should you sterilize baby bottles?
Sterilize before first use, then clean after every feeding and sanitize at least once a day. Daily sterilizing matters most if your baby is under 2 months, premature, or has a weakened immune system. For older, healthy babies with clean water, the CDC says daily sterilizing may not be necessary.
Do you have to sterilize baby bottles after every use?
No. For most healthy babies, thorough cleaning after each feeding plus sanitizing once a day is enough. Sterilizing after every single feed is generally only advised for the most vulnerable babies or when your water source isn’t reliably safe.
How do you sterilize baby bottles for the first time?
Any CDC-approved method works: boil for 5 minutes, run a microwave or electric steam sterilizer, or use a dishwasher sanitize cycle. Just make sure the bottles are dishwasher-safe or boil-safe first, and let everything air-dry fully.
Can you sterilize baby bottles in the microwave?
Yes, using microwave steam sterilizer bags or a microwave sterilizer tub. Follow the product’s water and timing directions, and don’t microwave glass bottles in steam bags.
How do you sterilize bottles without a sterilizer?
Boil them for 5 minutes, run them through a dishwasher’s hot sanitize cycle, or use the CDC’s cold-water bleach method (2 teaspoons unscented bleach per gallon of water, soak 2 minutes, don’t rinse, air-dry).
What water should you use in a baby bottle sterilizer?
Distilled water is best because it prevents the mineral scale that hard tap water leaves behind on the heating plate. Bottled or tap water works too, but you’ll need to descale the sterilizer more often.
Can you over-sterilize baby bottles?
You can’t really over-sterilize for safety, but frequent boiling or high heat can wear out nipples and cheaper plastics faster. Replace nipples and bottles when you see cracks, cloudiness, or stickiness.
The bottom line
Sterilizing baby bottles comes down to two habits: clean thoroughly first, then kill the leftover germs with heat, steam, or (in a pinch) bleach. Any of the five methods works, so pick the one that fits your life. For us, an all-in-one steam sterilizer and dryer made the daily grind of new-parent life a lot easier, which is why we keep recommending it.
See the Baby Brezza One Step Sterilizer and Dryer Advanced on Amazon
This guide shares general information based on CDC recommendations and our own experience as parents. It isn’t medical advice. Always follow your bottle and sterilizer manufacturer’s instructions and check with your pediatrician about what’s right for your baby.